Setup Visual Studio Code for Unity on Mac 2020 (Updated in 2021)

There are tons of articles online tells us it is 2020, we should use the Visual Studio code, which is a good coding tool (or IDE) with numerous extensions. This article is the complete and most easy guide on how to config your Visual Studio Code.
Things I am using:
- Macbook Pro 2017
- Unity: 2019.3.15f1
- Visual Studio Code: 1.46.0
Step 1: Install the .Net Core SDK, you can download the SDK from here: https://dotnet.microsoft.com/download
The latest version as of today is .NET Core 3.1. Download the pkg/dmg file and install.
Step 2: Install the mono, someone also suggested to download from its official website from: https://www.mono-project.com/download/stable/, I tried but not successful. Here I would show how I installed, copy and paste the following command to your terminal:
brew update && brew install mono
After installation, you should be able to see a path in your terminal, this is IMPORTANT, keep the path!:
/usr/local/Cellar/mono/6.8.0.123
You probably see a different version 6.8.0.123 here, which doesn't matter.
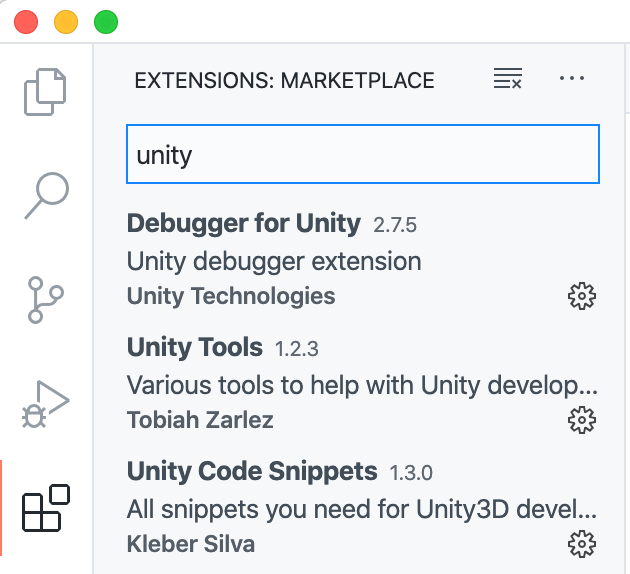
Step 3: Install necessary extensions:
Some extensions are necessary for project and coding, such as code auto compeletion, code formatting and so on. I would recommend the following three extensions:
Step 4: many tutorials claimed they already successfully with above three steps. However it doesn't work for me, some essential features are missing, i.e. VS Code even can't auto complete the Rigidbody2D for me. After googled around, I found the following trick:
Go to Code-> Preferences -> Settings, then search mono, and click Edit in settings.json.
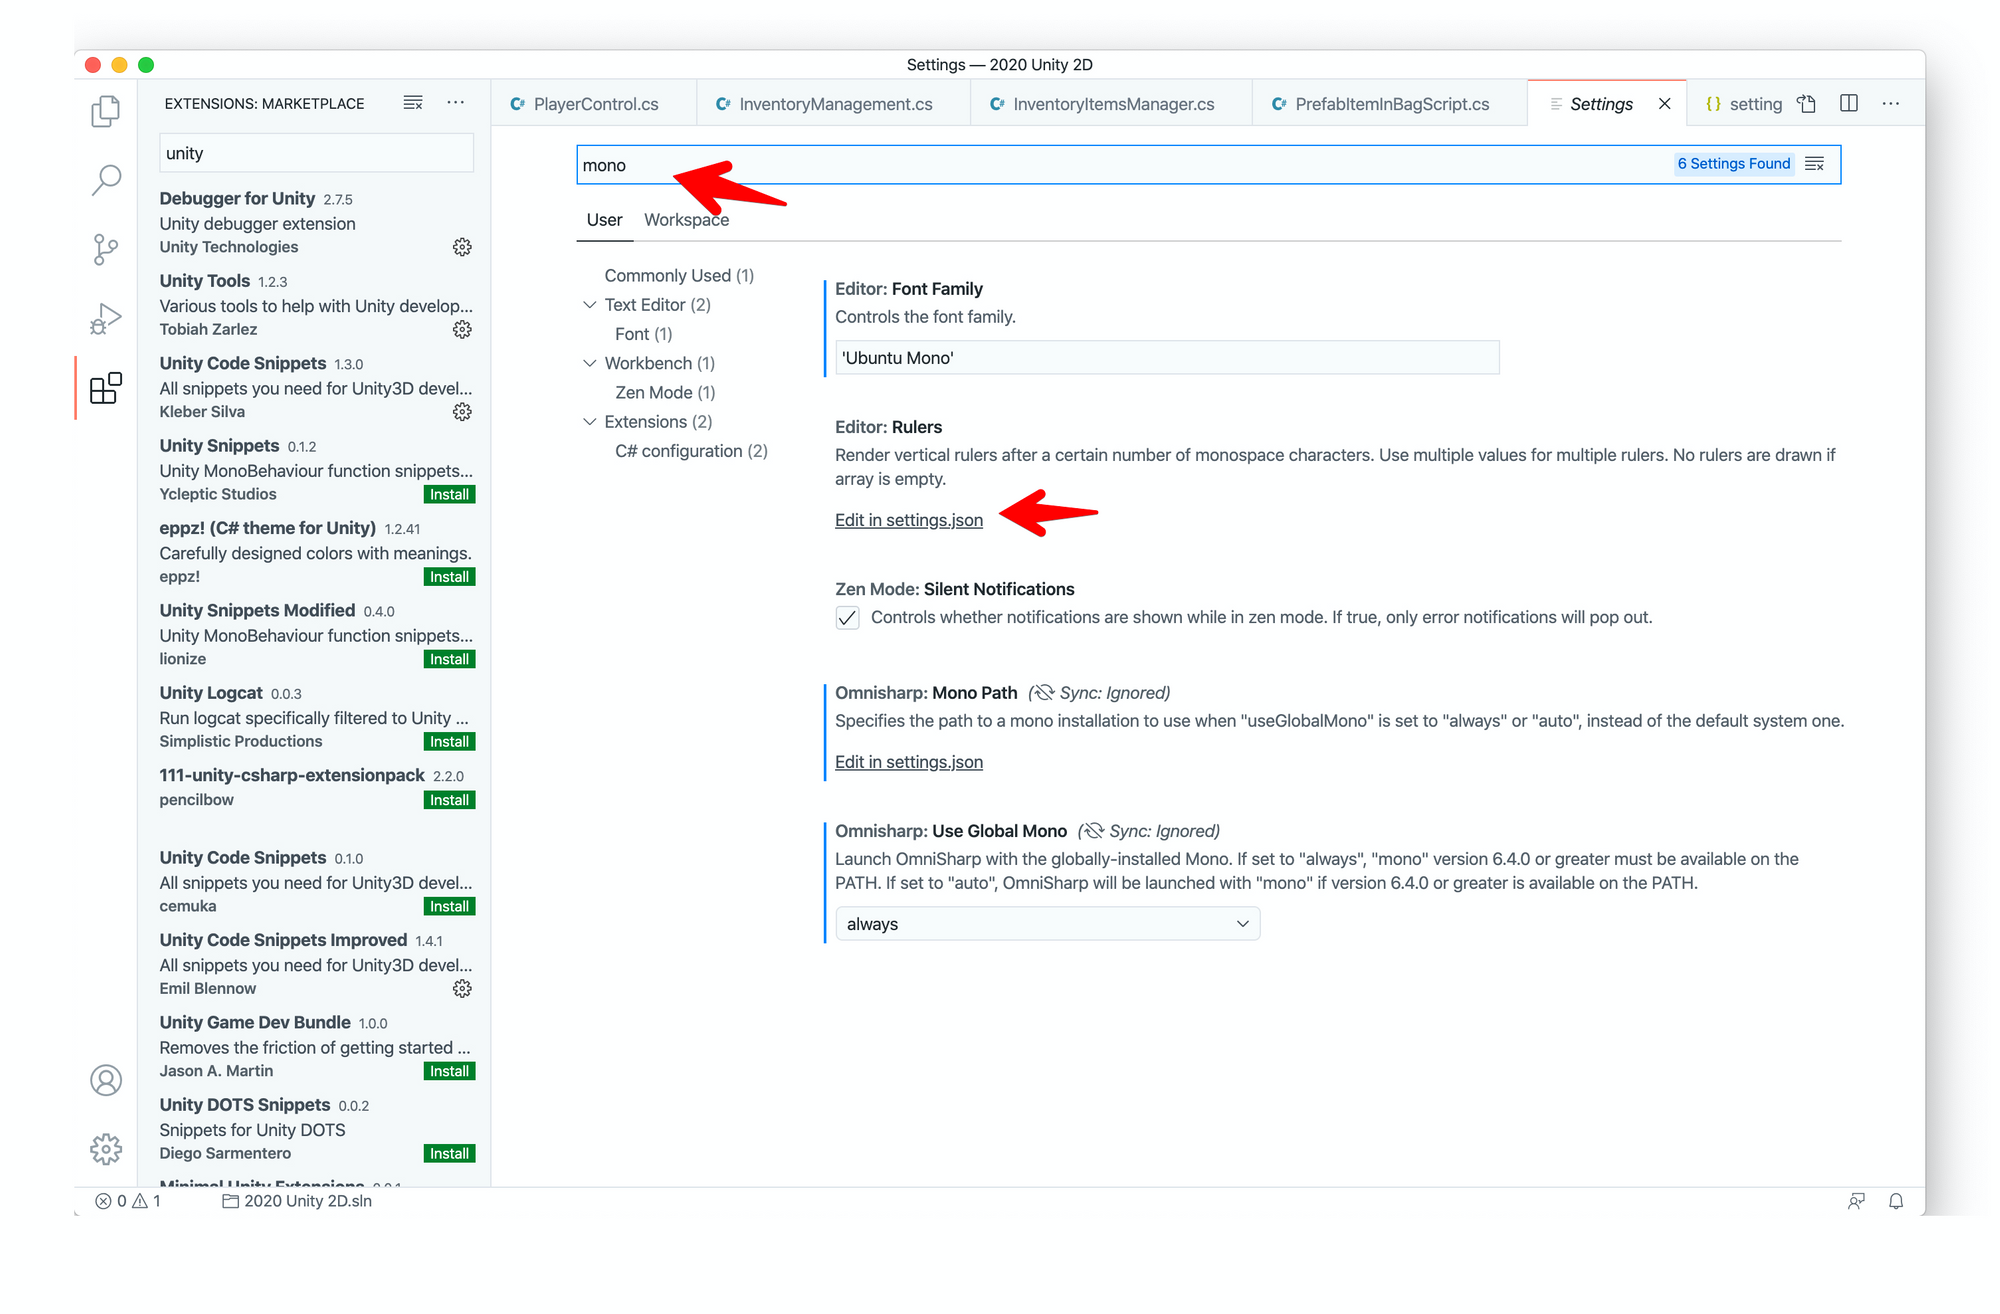
Then in the opened setting.json, search and find mnisharp.monoPath and put the path from step 2, and change the value of omnisharp.useGlobalMono to always, one example of my configuration:
{
    "editor.fontLigatures": true,
    "editor.fontSize": 14,
    "workbench.colorTheme": "GitHub Light",
    "editor.renderWhitespace": "none",
    "explorer.confirmDelete": false,
    "editor.codeLens": false,
    "git.enableSmartCommit": true,
    "omnisharp.useGlobalMono": "always",
    "omnisharp.monoPath": "/usr/local/Cellar/mono/6.8.0.123",
}
Quit and restart your Visual Studio Code to make the changes effective.
Wala~
Update in 2021
Since Apple has released the M1 chip, here is some changes on how to set the visual code for C# under M1 processor:
- Instead of having the
brew install monowhich gives out the following error:
Error: mono: no bottle available!
- Download the mono from https://www.mono-project.com/download/stable/#download-mac
The Path should be something like: /Library/Frameworks/Mono.framework/Versions/6.12.0.
Yours might be slight different, and put this path in the setting.json file:
{
    "editor.fontLigatures": true,
    "editor.fontSize": 14,
    "workbench.colorTheme": "GitHub Light",
    "editor.renderWhitespace": "none",
    "explorer.confirmDelete": false,
    "editor.codeLens": false,
    "git.enableSmartCommit": true,
    "omnisharp.useGlobalMono": "always",
    "omnisharp.monoPath": "/Library/Frameworks/Mono.framework/Versions/6.12.0",
}
Done~