
2 hours to master RxSwift - Part 1
Section 1: About this series
This series is to help people to get started with RxSwift easily with straight forward examples, plain explanation. And YES, if you would like to spend 2 hours with a bit efforts, I am quite confident you will master the RxSwift from zero to hero.
This is the part 1 of this series which will cover most of the topic on RxSwift, from the basic concept and usage to some advanced techniques. The whole series is using RxSwift 6.5.0 (latest as for now) and Swift 5.0.
Roadmaps:
Part 1: Introduction with quick simple example and few concepts (this article)
Part 2: More concepts in depth
Part 3: RXSwift with MVVM
Section 2: Introduce RxSwift
RxSwift is a popular reactive programming framework for Swift, which allows us to write code that responds to changes and events.
What is RxSwift used for? It is being used to create reactive programming in Swift. Before dive into the RxSwift, let's have a basic understanding on what is the Reactive programming.
Reactive programming is a programming paradigm which can efficiently handle asynchronous data streams, by using a set of operators to transform and manipulate these streams, such as user's input, UI change, network responses and so on.
Section 3: Why need RxSwift
Compared with the existing programing paradigm - Functional programming, there are few benefits.
- RxSwift enhances code re-usability and reduces the amount of code.
- RxSwift makes it easier to understand business logic, abstract asynchronous programming, and unify code style, therefore make the code more readable and easier to maintain.
- RxSwift makes it easier to write integrated unit tests, increasing code stability.
We will use a small example (in section 5) on above characters.
Section 4: Compared with Combine
Combine was introduced by Apple in 2019, which is another reactive programming framework comes with iOS 13+. Here are few comparisons:
1. Compatibility
RxSwift has been available since 2015 and supports iOS 8 and later, while Combine only supports iOS 13 and later.
2. API Design
RxSwift is designed to be more flexible and configurable, with a larger number of operators and customization options. On the other hand, Combine has a more concise and streamlined API, with a focus on Swift's built-in functional programming features.
3. Support
There are a large amount of projects already using RxSwift, so getting to know and master RxSwift is a necessary skill to get a job.
Section 5: Quick example of using RxSwift
1. Integrate RxSwift framework into project
Like many other 3rd party libraries, we need to install the framework. There are a couple of ways of doing so as fully documented on its github page: https://github.com/ReactiveX/RxSwift. Notice that the current latest version is RxSwift 6.5.0. However, there is an issue with the Swift Package Manager (SPM) installation. So we can either follow their workaround or use other means.
2. Functional programming
Imagine we are doing a view which will verify user's input on their email address. Here is what we used to do in Swift code:
// // ViewController.swift // RXSwiftExercise // // Created by Ben Liu on 6/3/2023. //import UIKit
class ViewController: UIViewController {
@IBOutlet weak var emailTextField: UITextField! @IBOutlet weak var emailErrorInfo: UILabel!
override func viewDidLoad() { super.viewDidLoad() // Do any additional setup after loading the view. emailTextField.addTarget(self, action: #selector(textFieldDidChange(_:)), for: .editingChanged)
}
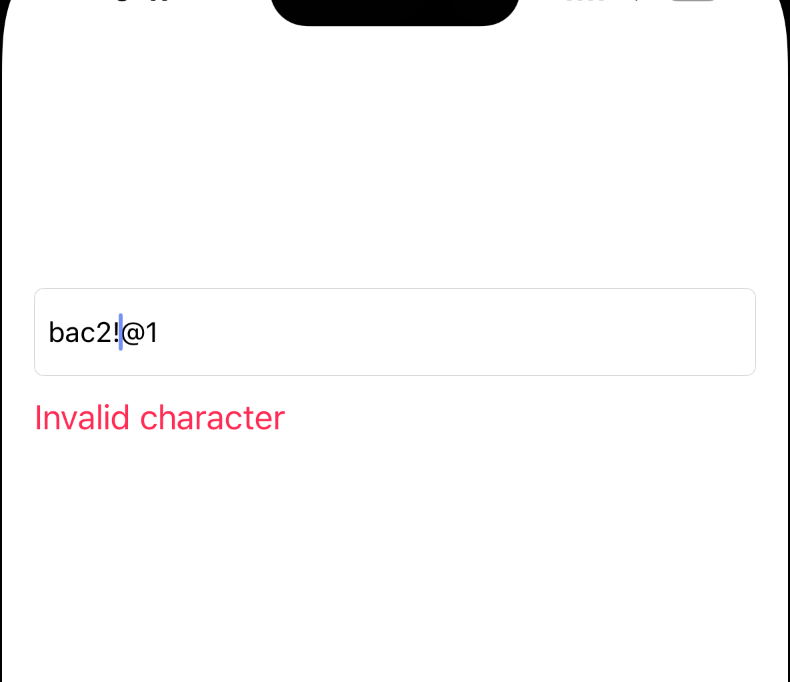
@objc func textFieldDidChange(_ textField: UITextField) { guard let email = textField.text else { return } if email.contains(”!”) { emailErrorInfo.text = “Invalid character” } } }
This will create a view, and once the user input a invalid character such as !, the error message will display.
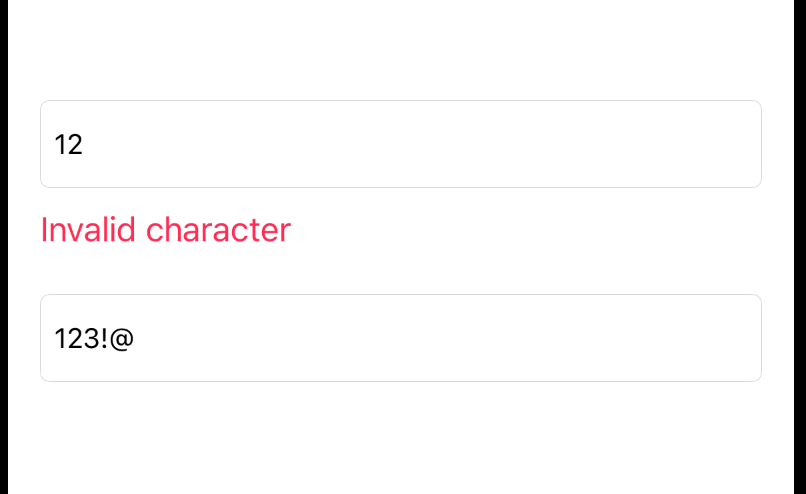
However, there are few problems with above method:
1, When user delete the ! in the input text field, the error message is still there, which is quite confusing
2, If we have multiple text inputs such as we want to add user’s username, mobile phone number and more, we need to add check on the textfield. See the code below:
// // ViewController.swift // RXSwiftExercise // // Created by Ben Liu on 6/3/2023. //import UIKit
class ViewController: UIViewController {
@IBOutlet weak var emailTextField: UITextField! @IBOutlet weak var emailErrorInfo: UILabel!
@IBOutlet weak var mobileTextField: UITextField! @IBOutlet weak var mobileErrorInfo: UILabel! override func viewDidLoad() { super.viewDidLoad() // Do any additional setup after loading the view.
emailTextField.addTarget(self, action: #selector(emailTextFieldDidChange(_:)), for: .editingChanged) mobileTextField.addTarget(self, action: #selector(mobileTextFieldDidChange(_:)), for: .editingChanged)}
@objc func emailTextFieldDidChange(_ textField: UITextField) { guard let email = textField.text else { return } if email.contains(”!”) { emailErrorInfo.text = “Invalid character” } else { emailErrorInfo.text = "" } }
@objc func mobileTextFieldDidChange(_ textField: UITextField) { guard let email = textField.text else { return } if email.contains(”@”) { mobileErrorInfo.text = “Invalid character” } else { mobileErrorInfo.text = "" } } }
There are still some problems that not resolved yet:
1, How to unit test the textfields rules
2, How to handle multiple textfields, i.e. 10 inputs, we have to create 10 TextFieldDidChange methods to deal with that in the worst case.
This stage of Source code can be found on Github.
3. Refactor with RxSwift
Time to show the power of RxSwift:
import UIKit import RxSwift import RxCocoaclass ViewController: UIViewController {
@IBOutlet weak var emailTextField: UITextField! @IBOutlet weak var emailErrorInfo: UILabel!
@IBOutlet weak var mobileTextField: UITextField! @IBOutlet weak var mobileErrorInfo: UILabel!
let disposeBag = DisposeBag()
override func viewDidLoad() { super.viewDidLoad() // Do any additional setup after loading the view.
setupBinding()}
func setupBinding() { emailTextField.rx.text.changed.subscribe(onNext: { guard let text = $0 else { return } self.emailErrorInfo.text = text.contains(”!”) ? “Invalid character” : "" }).disposed(by: disposeBag)
mobileTextField.rx.text.changed.subscribe(onNext: { guard let text = $0 else { return } self.mobileErrorInfo.text = text.contains("@") ? "Invalid character" : "" }).disposed(by: disposeBag)
} }
With just 8 lines within setupBinding method, we make the code much simpler and concise. More importantly we can handle as many new textfields as we want, such as user names, address and so on.
4. Test with the textfields
Here since we are using the text change as the source input, it is better to test with the UI test.
import XCTestfinal class RXSwiftExerciseUITests: XCTestCase {
override func setUpWithError() throws { }
override func tearDownWithError() throws { // Put teardown code here. This method is called after the invocation of each test method in the class. }
func testTextFields() throws { let app = XCUIApplication() app.launch()
// test email let emailTextField = app.textFields["email"] emailTextField.tap() emailTextField.typeText("123") let emailErrorLabel = app.staticTexts["emailError"] emailTextField.tap() emailTextField.typeText("!") XCTAssertEqual(emailErrorLabel.label, "Invalid character") // test mobile let mobileTextField = app.textFields["mobile"] mobileTextField.tap() mobileTextField.typeText("456") let mobileErrorLabel = app.staticTexts["mobileError"] mobileTextField.tap() mobileTextField.typeText("@") XCTAssertEqual(mobileErrorLabel.label, "Invalid character")
} }
This stage of Source code can be found on Github.
Section 6: RxSwift Core concepts
In the example above, we saw some code snippet such as subscribe without any explanation, we will go through 4 key concepts and principles on the RxSwift: Observable, Subscriber, Operator and Subject.
Observable
Observable is core concept in RxSwift. In RxSwift, an Observable is a sequence that emits events (values or errors) over time, and notifies its observers(also called Subscribers) when these events occur.
In RxSwift world, arrays, strings, numbers, timers, network requests, and user interface events needed to convert into Observables first before use. An observable can emit a number of events followed by either a completion event (signifying that the sequence has ended) or an error event (signifying that an error occurred). There are few sub-types in the Observable or Observable Sequence: Single, Driver and Signal. We will cover this in the later part.
Subscriber
On the other hand, when events is emitted from Observable, we need the Subscriber to receive, which specify who can and will receive those events. This process is callled subscrition. A similar example in the real world is when we follow a youtuber, we will receive notification once they updated their channel.
The Subscriber has three main methods to deal with events:
onNext: this is the main one used to handle every emitted element from the Observable.onError: handles any errors emitted by the Observable, such as network failure, fallbacks and so on.onCompleted: handles the completion event emitted by the Observable. Once reevied thecompletionevent, theObservablewill NO emit any event anymore.
The Subscriber also has a dispose() method that can be used to cancel the subscription and stop receiving events from the Observable.
Example of how to use Observable and Subscriber
The following is an example of creating an Observable and Subscriber
import RxSwift// Create an observable that emits an integer array let observable = Observable.Observable.from([1, 2, 3, 4, 5, 6, 7, 8, 9, 10])
// Subscribe to the observable to receive its emitted values _ = observable.subscribe(onNext: { value in print(value) }, onCompleted: { print(“Observable completed”) })
We will get the following output:
1
2
3
4
5
6
7
8
9
10
Observable completed
With the example above, first create an Observable emits three integer values. Then subscribe to the Observable and print each emitted value to the console using the onNext closure. Finally, we print “Observable completed” when the Observable completes emitting values.
Operator
In RxSwift, operators are functions that can “operate” on Observables and return Observables, which will allow us to do some specific task in a simple way. Take the above example, suppose we only want even number, we can simply add a filter:
let observable = Observable.from([1, 2, 3, 4, 5, 6, 7, 8, 9, 10])
// Subscribe to the observable to receive its emitted values
_ = observable
.filter { $0 % 2 == 0 } // filter to even numbers
.subscribe(onNext: { value in
print(value)
}, onCompleted: {
print(“Observable completed”)
})
We will get the output:
2
4
6
8
10
Observable completed
Beside filter, there are many operators in RxSwift, each with its own specific functionality, here are some common used ones:
map: transforms each element emitted by an Observable by applying a function to it.filter: filters the elements emitted by an Observable based on a predicate.flatMap: transforms each element emitted by an Observable into another Observable, then flattens the emissions from these Observables into a single stream.merge: combines multiple Observables into a single Observable by merging their emissions.zip: combines the emissions of multiple Observables into a single Observable by emitting tuples of corresponding elements.
We will cover more on this in the later article.
Subjects
In RxSwift, the subject is a special type which is a combine of observable and subscriber, meaning it can either observed by multiple subscribers, and also can emit events to others.
There are several types of subjects available in RxSwift, including:
- PublishSubject: doesn’t have an init value, emits only new value to its subscribers
- BehaviorSubject: have an init value, emits latest value to subscribers
- ReplaySubject: emits a buffer of values to new subscribers, so they can receive max buffer size past values before subscription
- AsyncSubject: emits only the final value to its subscribers only after the sequence has completed
// Example of PublishSubject let subject = PublishSubject<String>() subject.onNext(“test”) // No one is listening at this point let subscription = subject.subscribe(onNext: { string in print(string) }) subject.onNext(“abc”) // test is not printed, only abc// Example of BehaviorSubject let subject = BehaviorSubject(value: “abc”) subject.onNext(“def”) // print out due to this is the latest value let subscription = subject.subscribe(onNext: { string in print(string) }) subject.onNext(“ghi”) // print out def and ghi
// Example of ReplaySubject let subject = ReplaySubject<String>.create(bufferSize: 4) subject.onNext(“1”) subject.onNext(“2”) subject.onNext(“3”) subject.onNext(“4”) subject.onNext(“5”) let subscription = subject.subscribe(onNext: { string in print(string) }) subject.onNext(“6”) subject.onNext(“7”) subject.onNext(“8”)
// Example of AsyncSubject let subject = AsyncSubject<String>() subject.onNext(“Hello”) subject.onNext(“World”) let subscriptionOne = subject.subscribe(onNext: { string in print(string) }) subject.onNext(”!”) subject.onCompleted() // print out ! if onCompleted is called, otherwise no output.
Conclusion
In this article, we have covered what is Reactive programming, and how does that compared with the functional programming paradigm. We also saw a simple example of how to use the RxSwift on textFields when creating a login form.
We also spent some time on the 4 RxSwift core concepts: Observable, Subscriber,Operator and Subject. Which are the foundation of the Reactive programming in RxSwift.
What is Next
In the next few articles, we will dig more depth into the RxSwift, including Observable, Subscriber,Operator and Subject.